Pick Two

I got to explain this today at work to someone....always loved it.

PICK TWO

After years of designing posters and ads and costumes and sets and props and etc, I've found that this triangle is the one truth and constant in everything.
So many times I've had people come up to me last minute with a challenge. Now mind you, I've gained the reputation of being the 11th Hour Man (not the best superhero  name, but whatever skills you got,eh?...) and have made wonderful things happen with just a few hours to go.  However, due to time constraints, they usually don't last past the time they need to be on stage. *sigh*
Just take a few minutes, my dear Maker friends, and put this theory towards any of your designs or constructions and you'll see at the very least a grain of truth in it.

Wok of Bones

Another little Halloween thing that hubby put together actualy using something I bought and something Mum gave me.
The kitchen is his area, that's just how it is. And by staying out of it, I receive roast pork and countless other goodies. The basement is my area. By staying out of there, he receives countless creations from my mind.
I picked up this 'Bag of Bones' from Shoppers for about $15.

I received this wok from my mum for nada, just needed it out of her house.
So, we combined them with some wooden utensils to make a nice little kitchen feature.
 
Not too shabby for a minute of work, eh?

Witch Tree Tutorial

Here is a quick and rough guide on how to make this. It was inspired from Martha Stewart's Tree and a my own access to supplies at the Dollar Store.
The theory and basic practice is here, but open to the supplies that you have.
Supplies:
Rafia Cord

Gorilla Glue
Air Dry Clay
Ribbon

Little Skulls

Not so little skulls


Plastic Wrap (any kind I supose)

Cauldron (plastic and Dollar Store)
Paper Mache Clay
Floral Foam
Branch (spooky)
Also:
Black Spray Paint,
River stones

rubber earthworms
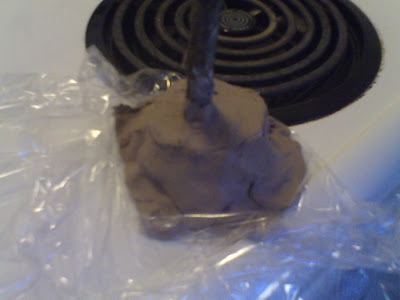
Alright, First step, spread out some plastic wrap to protect the area. Then using your air dry clay, start making a base to hold your branch up straight in the cauldron. Use your judgement.

Cut up your floral foam to fill the bucket to help brace the branch.
Glue cay to the botom of the cauldron with gorilla glue.

Fill with floral foam.
Smear Paper Clay over the top to further reinforce the branch.

Let dry a little.
Spray paint black. The add gloss.

Start adding the stones to the paper clay and push them in a bit, thinking of how they will also help support the branch. When the clay dries, it will help hold the branch up.

At this point, I forgot to take pictures.
Essentially, just glue the string to the skulls in the way that you think looks best. Drill them, or just glue on top of the skull, you really can't go too wrong with this step. Also, you will probably not get the same skulls or the same ribbon as me. Again, use your judgment.
Also, the rubber earthworms and the tiny skulls were thrown in at the base of the branch on top of the stones to make the ground seem a bit more textured. (pic to follow soon)
And there you have it, a VERY rough tutorial on how to make a witch's ree

Witch Tree

This was a nother side project I was doing while waiting for paper mache to dry.
Yes, it's from Marta Stewart.....fuck off.
The above shot (again, forgive the camera....better pics coming soon when I can find the cable for the good camera) showing the basic shape and decorations.
The tree is an old rose bush, painted black and spray glossed in a plastic cauldron filled with river stones, and decorated with small skulls hung by alternating yellow-orange ribbon and black rafia cording.
The whole thing stands about 4 feet tall and provides a great creepy shadow at night when I get a glass of water at 3am.
Total time (excluding drying time): about 2 hours. Total cost: about $8 (if you already have the can of gloss and paint).

Haunted Book Finished

I finally finished the Haunted book to my liking.
I've changed the rings on the spine to be aged gold metal by applying the same technique of paper towel and glue, spray painting gold, then brushing watered down black latex paint and toweling it off.
I also added a book mark. This was made from a piece of craft foam (dollar store strikes again), some watered down black paint and generous use of a lighter to add texture
Let me know what you think.

My First Online Purchase

Never having purchased anything online before, I was excited to buy some Halloween treats for myself and my guests for the upcoming celebrations. Through SpiritHalloween and the help of a friend, I ordered the following gelatin moulds for my creepy dinner.
A heart mould that makes this

For the meatloaf course, a hand mould
  
and of course, my fav and final presentation, the brain mould

Eternal Pumpkins 2010

Here we go. rough shots of them after 3 layers of paper mache.
Top Shot
....some side shot action....

and last shot...call it a close up.note the textury textureness.

The only problem I am having with making these in the new house is that I am workng in the basement, thus, damp. They are taking a longer time to dry than I had anticipated, and I begn to worry about mold and other nasty stuff.

Evil Book Progress

Here's the progress of the Haunted book I've been making. Though my little camera has no flash, it's a good little effect for a book like this, especially in a badly lit basement.
First shot is close to front on. I have it drying on a modified rack I made from an old metal mirror frame that  bent into a curved table.
Here is a shot of the dimension of the skull on the cover 
And  a close up of the nose, which I tried to make look like a key hole. Still needs a bit of work

Halloween Costume Ideas

Here's a couple ideas that have been running through my head for costumes. This post will be re-edited a dozn times before I'm done I'm sure.
First up, Thor (source image is from CGSociety site....can't find the artist to link it back.)This is a just a thought waiting to be fleshed out, but still able to be modified. REALLY love the bracers wth the lightning bolts on them, and the fact that I've always seen Thor as a forger rather than flashy warrior....no idea why.
Second, Hellboy & Abe Sapien (couple's Costume). This one works because of our body types, and the fact that I really wanna mae both of them, thoguh they would require a great deal of time and money to make. Then again, anything worth having is worth that.
Next up, a variation on Hellby, Van Helsing. This is one I've always wanted to do. It's got that sort of alhemical/steampunk/classic anti-hero thing going on that I've always loved.
Next, just cause it's Kitsch, some kind of male witch.  But mostly I'm posting these images cause they are too funy not to include.
Even though it's a Sims skin I found somewhere, it's a good jumping off pont. I'd like that hat to be more like this. I'd change the moon/star image, but pretty much keep all of the rest. I'd also keep the brown leather material and make the above costume with the same palette of colours, but in the same style.
As you can see, my mind is still whirling around and maybe it'll settle down on something in the next week or so, providing me wit enough time to put something together and have it ready on time.