Oh the possibilities


Just thinking of all the things I'd do with this. 
From the site:
  • Space-age plastic melts in a microwave or hot water at 160oF, then remains safely moldable by hand until it cools and locks rigidly at room temperature. Simply reheat to re-shape as often as you like.
LINK HERE to Maker Shed

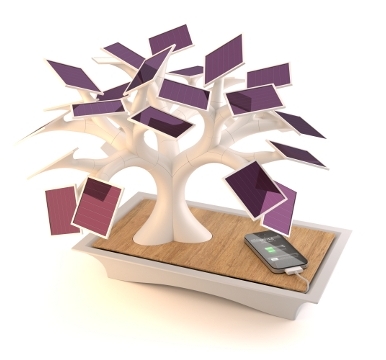
2 differant people and the same idea

Here's a little sample like minded people thinking of the same thing.
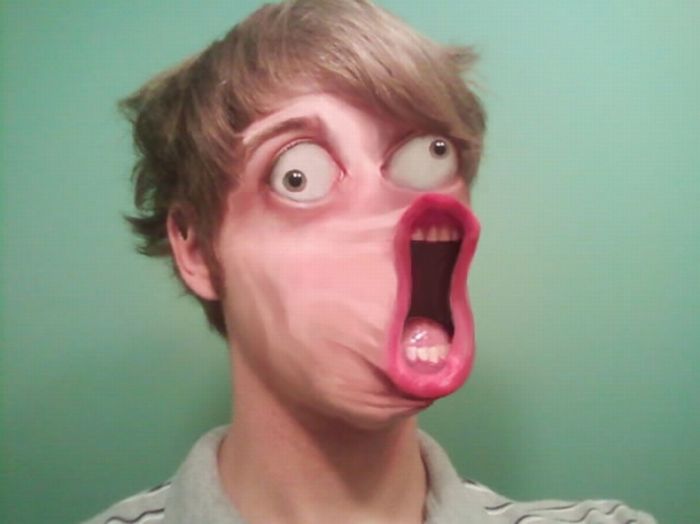
This kid
and this designer came up with the same idea for a solar charger based on tree design.

For my Drag Queen Friends.....

Found this link at  Laura Thoughts for a Magnetic Make up Frame.
Love its simplicity to view everything you have in your arsenal and keep it up and off the table at any given time.
I think if I were to modify this, I'd not use a patterned paper like that, but rather a 50% grey colour/simple patter to REALLY see the colour for what it is. Another option would be to use a colour close to flesh tone to see how the colours should look when applied.
Another option would be to double the frames, hinge them on a mirror so it can close and add a light to the top (most likely a more intricate and involved lighting system than a top light......overhead lighting *shudder*).
Just an idea, but wouldn't be too much more work.

Japanese City Logos

Today I found this great link to Japanese City Logos through Signalnoise , AKA:  James White, amazing visual artist here in Halifax.
I don't have very much experience with the Japanese language, let alone design, so this was a new exposure for me.
I really like the simplicity of colours used for these, and the further you read into them, they suddenly become incredibly complex.
Admit it, you started thinking about how to do your hometown, didn't you? If I were to try, I'd have to somehow combine Pulp and Paper plant with golf course and farms into a logo for my home of Abercrombie.

Shit I'd Like to Try!

Found this great little link on 'How to OMBRE clothes' over at cotton and curls.

Blast from the Past

About a week ago, my mother came up for a visit and dropped off a bunch of albums from my youth since she was cleaning out the house.
Nostalgia reigned supreme for 2 days, but special mention was made for one particular envelope.
As she was sorting through it all, an envelope fell out. Her first instinct was to toss it, but it's weight was substantial enough for Mum to question what it contained. After she opened it, she remembered it and was thankful for her hesitant sorting.
A letter from one from my favorite teachers I've ever had, dated the day I graduated from elementary school, with advice for me for my entrance into Junior High. I remember the day and the letter like it was yesterday.
It's appearance happened during a time of perfect coincidences all in a row. During Grade 3, I began reading "The Chronicles of Narnia" series. At the time I was an avid dancer with my local clogging group and as I learned and mastered each new song and routine, my mother would reward me with a new book from the Chronicles of Narnia series.
After a week of consistent trials on my patience and endurance from work, someone from my office building offered me the complete set, as they were throwing them out. All the while, I was playing with working on a way to create an animatronic Reepicheap, a character from the novels. Naturally I took them home and delved again into the world of Narnia.
I've scanned it so I could share it with any of you who view this space online.
 And, still in perfect condition, in the same condition as when they were printed, here are the dollars.
Ever since I have received this letter, I have carried with me. It may seem like a silly thing to do, carrying a letter that is meant to prepare you for a time in your life that was 22 years ago, but the fact it is an artifact of my life and a big part of who I am today gives it something so much more than the paper it is written on.
It came at a time when I needed it most, though I didn't realize it.

Mum:"Do you remember when Miss Mahoney wrote you a letter the day you left Dr. W. A. Macleod---"
Lee"It was 3 pages about getting ready for the new school and she gave me 5 $1 bills 'cause they were done making them....I still have "Mr Wolf and me"...there are octopus stickers in it."
Life is funny when it throws you these neat little curve balls.
Thanks Miss Mahoney...for everything.

Fun Quote I saw online

"I'm not saying she's fat, but if I had to name the 5 fattest people I knew, she'd be 3 of them."

The Town Clock

Headpiece made for Natassha N for the Mz Gay Halifax Pageant.

Town Clock of Halifax located on Citadel Hill


Headpiece made on my kitchen counter 
(with artificial turf lined shrug on the body form in the left background)


And mounted on Natassha's head

The entire set was made for under $20, including paint, glue sticks and materials.
The clock is constructed out of salvaged foamcore (a seating chart for a charity event held by the Nova Scotia Mental Foundation), wooden dowels from the dollar store, a ping pong ball, a cat toy painted white and an old plastic bowl covered in water activated packing tape and given a faux copper finish.
The shrug is made froma hula hoop, artificial turf, glue stick and a couple toy cars from Value Village.
Total amount of materials: $18.50.  Total amount of  time building the set: Approximately 24 hours (including drying time).

Dragon Trophy Update #7 (Almost there....)

First shots of the nearly complete dragon!!! He's not entirely complete, as I still have to do his eyes, seal him, and may be going at him with an airbrush for a bit to get the shading I want.


I'm not entirely sure I'm loving the green version, he looks a little first generation GODZILLA for me.But green is a good one to start with.
It really was my first  run at a prop like this, so taking that into consideration, I think he turned out great. I'm already planing the build of the next one.
The one thing I have to say is that I learned a lot through making this one, mostly through mistakes and things that didn't think about for the process.
For example:
  • Teeth: They will be made of something better than salt dough and will be installed LOOONG before I paint the mouth and  tongue. The teeth got in the way, though only the lower ones were installed, and made maneuvering the brushes almost impossible.
  • Jaw: I should have made this separate and attached it later. As I applied more mache and material, the jaw line started to blend a little too much with the neck and he came out looking a bit stocikier than planned.
  • Skin Texture: Was a bit rougher than I had hoped it would look....next one I'll move towards a smoother appearance and paint on a texture rather than try to make my own. This skin texture however would excel in another piece, something like a Stone/Dirt Monster or a Warty look.
Final pics tomorrow or the next day when the paint has dried and I've finished him off!

Dragon Trophy Update #6

Finally had the time to put the last bit of skin on the dragon, but due to the reliable old dampness that is Dartmouth, I gotta wait for the damn stuff to dry.
Though I have to say that having this much done really makes me feel good and I'm realy looking forward to the paint job ahead me.

Dragon Trophy Update #5

Life goes on, but mostly gets in the way of the REALLY important stuff, like making a dragon.
So I added the top row of teeth.....
Then added the tongue, and put a rough paint job down for the inside of the mouth...
Then added the fins to the sides of the neck (bent wire, grocery bags, glue gun and a heat gun...ooooo I love my tools)....
Wrapped the horns with fabric soaked with paper mache/glue mixture and added some texture with paper clay....

Now, it will dry untill I can make some more paper clay with the new method I found online. When you finish boiling the paper and blending it with a multitude of kitchen tools, you put it in a pillow case and tie off the end, then throw it in the dryer. The end result is paper fibres that have 'pilled' like a sweater, only about 3 lbs of it at a time. This provides a bumpy, pebble like texture that I'm using for a monster skin sort of look. The pictures don't reflect it yet, but will show more when painted.


Keep you updated!!

Posters in the last 2 weeks...

 Trash-o-rama:Last minute poster pulled from my ass.....the poster reflects this.

Easter Show; Equally fast as the Trash-o-rama poster, but let's face it, it is a Ham Holiday. I do have to say that bending the logos around the eggs was done completely without any tutorials, it was something i figured out during my work day that actually WORKED OUT!


Victoria Day weekend Appreciation BBQ poster:Linda and her husand Gerry have been hosting this for years, so I figured it was time to out them on a poster. We have a BBQ and Rummoli tournament all on Victoria Day Weekend. So I photoshopped her face onto the Queens face and aded card and a spatula.

The Duchess' Bird Watching Perch

After seeing this post on design spongethis post on cut out and keep, and yet another on Threadbanger, I was inspired to make one of these for the cats.

Ever since the spring started, the birds have returned to our area and our cats couldn't be happier. It's like Kitty Cable out the windows of our house.
The only problem is that our front doors are a solid panel of aluminum a thrid of the way up, and our cats are not, so they've been finding creative ways to look out the window, including sitting on my laptop and pressing every key and messing it up a bit.
When I came home from my parents at Christmas, I had more than I came with and used an old suicase they wanted to be rid of to carry my gifts home. i of course had immediate repurpose for this case the second I touched it.
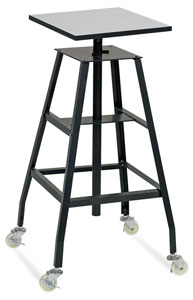
Using all the instructions from the post on design sponge, I whipped this together in less than 10 minutes. The  hardware ended up costing me around $9 with taxes (bought the exact same ones in her post from Home Depot). The legs came from a table I liberated from the Salvation Army Thrift Shop for a mere $3 (the top of the table has been epoxied to a lazy susan to make a sculpture stand, much like the image below, minus the legs/stand so that I can access all side of my paper mahce sculptures when forming or painting.). 

The funniest part is that it took longer to clean the suitcase than it did to actually finish the mounting of the hardware and putting the legs in. We now have a space to store all the toys and other cat things off the coffee table with the interior pockets and under the pillow-blanket thing.

To keep the lid from closing down on them, there is a piece of hollow aluminum tube (formerly part of an aluminum arrow shaft) on the interior edge of the hinges. I'm looking at a hook and catch system instead (the kind of bent nail and eye hook idea) but I can't seem to find one in brass to match the suitcase hardware.
Additionally, a proper pillow would be a great improvement. I searched through my fabirc stash tring to find something with an appropriate colour or weight, but found nothing. I'm sure I'll find a t-shirt the right colour and just stitch that up and fill it with some cotton batting I have.

Dragon Trophy Update #5

Just a  quick update....not too much more done, but wanted to get some pics up on here.
Using the Easter eggs really helped me define the eye a bit better, it has a bit more character that the retarded horse it was looking like previously.
I also added the first layer of papermache to the horns to get a rough idea of where everything is going to sit and end up. Try as I might, wireframe and guidelines don't ever give me the confidence that things are going to work out.
Also added paper mache clay to the inside of the mouth to help the teeth sit better and make the mouth look more like...well... the inside of a mouth. The hard part was making something the tounge (which was made from shaping some tinfoil and covering with mache) could attach to, while still having an opening to the throat.
So here's a shot, inside the maw of the beast.
You can see the throat hole, as well as a few teeth that took some damage when I dropped it when moving it to dry. I kinda like the slightly damaged teeth on him actually....gives him a bit more 'grizzle'.....if that's the right word.
Like I said before, he's really a design on the fly, but I've been having a lot of happy accidents with him.

Dragon Trophy Update #4

RAAAAAAWWWWWWRRRRRR! Salt Dough Teeth......rawr.
and new eyes...the styrofoam ball cut in half was glued in an uneven fashion, so I replaced them with a plastic easter egg cut in half and hot glued in place...

I'm working on the tongue right now and have the top row of teeth in the oven as I write.

Dragon Trophy Update #3

So I took the image from the last stage into photoshop and roughed out the final idea. Originally, I was going to free form make this (fake it as I went really) but decided that design decisions had to be made so it would finish the way I want it to.
 The "Before"
 The "Kinda After"

Teeth to be made with salt dough,  gills made from coat hanger wire and starched fabric, and still deciding the skin texture. One option is individual scales made from slab paper mache, the other is paper mache clay shaped and carved into the scales.

Dragon Trophy Update #2

Dragon Trophy Update! Remember those damn horns that were seriously making it look like water buffalo? Magically and mysteriously, they came off. Not so much a mystery as it fell off the table and trying to catch it I managed to snap off both horns. No big loss.
I added the balloon half to build up the snout, and glued on a styrofoam ball cut in half for the eyes.
 I think in this picture he looks like the retarded horse from Family Guy.
As far as the horns go, I just cut out the base forms out of cardboard and glued them together. The previous shapes were kinda bothering me, so a fresh start on that aspect was necessary.


I'm pleased with the progess I'm making on this and will keep posting as much as I can.

Nest Egg Bank Finished

As mentioned a few days ago, I was working on an Egg Bank to save up a bit of coin for my little indulgences.
I finished off the nest with some paper mache sticks, which are very easy to make.
I found a paper mache site with tutorials and tips, and one stuck out for my project at hand, here's the link.
Making a slab, then cutting it into strips and rolling it between my hands gave a great shape and texture.


I gave the nest about 5 washes of varying browns, blacks and even a lighter shade of flesh tone, then wiped off excess with paper towels. In hindsight,  should have painted the base first before I glued the tops layers on. There were dozens of little spots that I couldn't reach with my brush, so I ended up almost pouring the wash into the nest and swishing it around.
The egg was just the paper mache balloon that was painted white, a hole cut into the top for the coins and hot glued to the base of the nest.
When all was finished, I sprayed it with a finishing spray I had. It wasn't until I let it dry that I remembered that it was a high gloss spray. I think I'll pick a matte finish this week and re-spray the whole thing as the shiny-gloss kind of detracts from the finished piece.
Now, I guess it's time to start filling it with my spare change and dread the day I have to break it to get into it.

The Forgotten Pumpkin

This weekend was my first weekend I had to spend in the basement. Hubby loves seeing me at this point since I stay out of the way upstairs and just keep coming back up dirtier, grubbier, more painted and just plain happy.
When I stepped down from my previous responsibilities with a charity organization, I made a commitment to myself that I would spend more time on my OWN work for a while. I stepped down the first week of February and got back to work by the end.....close enough.
As I was working on my dragon head project, I found a little devil of a pumpkin hiding behind some supplies. I picked him up and realized that I had totally forgotten about him! He was fully paper mache'd, with the exception of the back third of him not being covered in paper mache clay, paint job and filling in a few holes.
After checking back on my blog, I was shocked that He isn't even mentioned anywhere. I recall working on him and taking pictures, but wasn't going to post until the work was done.
It's his time to shine now! I finished up to about 90% of him last night, just waiting for him to dry to call him done.
Here are some pics of his humble beginnings. I used 2 masking tape empty 'cores' (the masking tape was done and I had these 2 carboard tube/rings left)that became eye socket forms. Tinfoil was used to bulk up the cheek bone areas. The mouth is shaped from leftover 'fuel' boxes (RE: beer case) cut and roughly glued into shape.

The last pic is how he was left as of October 30th, 2010. He wasn't ready to be displayed, so he went to the back of the cave with the intention of finishing him right away.
You can see the back third of the pumpkin doesn't have any clay or texture on it, as well as the mouth is still open and the structure/supports for the mouth is still visible.

Kinda looks like the alien hybrid from Alien...well, at least the beginning part of that sculpt.
A couple shots of the back and on the stairs for scale:
As I'm looking at him in pictures, I'm starting to realize just how strange is looks with no teeth...like Grampa Simpson without his dentures. I'm also a little concerned about the top jaw's angle, or lack thereof. I might go back and add an angled bit and carve in some teeth to the jaw.
Like I said before, he's not done -not even named yet- but he is no longer forgotten. Any comments orideas are more than welcome.