Dragon Trophy Update #2

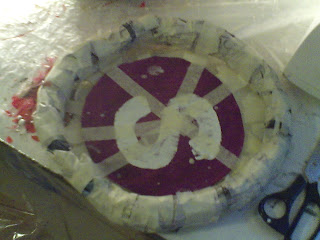
Dragon Trophy Update! Remember those damn horns that were seriously making it look like water buffalo? Magically and mysteriously, they came off. Not so much a mystery as it fell off the table and trying to catch it I managed to snap off both horns. No big loss.
I added the balloon half to build up the snout, and glued on a styrofoam ball cut in half for the eyes.
 I think in this picture he looks like the retarded horse from Family Guy.
As far as the horns go, I just cut out the base forms out of cardboard and glued them together. The previous shapes were kinda bothering me, so a fresh start on that aspect was necessary.


I'm pleased with the progess I'm making on this and will keep posting as much as I can.

Nest Egg Bank Finished

As mentioned a few days ago, I was working on an Egg Bank to save up a bit of coin for my little indulgences.
I finished off the nest with some paper mache sticks, which are very easy to make.
I found a paper mache site with tutorials and tips, and one stuck out for my project at hand, here's the link.
Making a slab, then cutting it into strips and rolling it between my hands gave a great shape and texture.


I gave the nest about 5 washes of varying browns, blacks and even a lighter shade of flesh tone, then wiped off excess with paper towels. In hindsight,  should have painted the base first before I glued the tops layers on. There were dozens of little spots that I couldn't reach with my brush, so I ended up almost pouring the wash into the nest and swishing it around.
The egg was just the paper mache balloon that was painted white, a hole cut into the top for the coins and hot glued to the base of the nest.
When all was finished, I sprayed it with a finishing spray I had. It wasn't until I let it dry that I remembered that it was a high gloss spray. I think I'll pick a matte finish this week and re-spray the whole thing as the shiny-gloss kind of detracts from the finished piece.
Now, I guess it's time to start filling it with my spare change and dread the day I have to break it to get into it.

The Forgotten Pumpkin

This weekend was my first weekend I had to spend in the basement. Hubby loves seeing me at this point since I stay out of the way upstairs and just keep coming back up dirtier, grubbier, more painted and just plain happy.
When I stepped down from my previous responsibilities with a charity organization, I made a commitment to myself that I would spend more time on my OWN work for a while. I stepped down the first week of February and got back to work by the end.....close enough.
As I was working on my dragon head project, I found a little devil of a pumpkin hiding behind some supplies. I picked him up and realized that I had totally forgotten about him! He was fully paper mache'd, with the exception of the back third of him not being covered in paper mache clay, paint job and filling in a few holes.
After checking back on my blog, I was shocked that He isn't even mentioned anywhere. I recall working on him and taking pictures, but wasn't going to post until the work was done.
It's his time to shine now! I finished up to about 90% of him last night, just waiting for him to dry to call him done.
Here are some pics of his humble beginnings. I used 2 masking tape empty 'cores' (the masking tape was done and I had these 2 carboard tube/rings left)that became eye socket forms. Tinfoil was used to bulk up the cheek bone areas. The mouth is shaped from leftover 'fuel' boxes (RE: beer case) cut and roughly glued into shape.

The last pic is how he was left as of October 30th, 2010. He wasn't ready to be displayed, so he went to the back of the cave with the intention of finishing him right away.
You can see the back third of the pumpkin doesn't have any clay or texture on it, as well as the mouth is still open and the structure/supports for the mouth is still visible.

Kinda looks like the alien hybrid from Alien...well, at least the beginning part of that sculpt.
A couple shots of the back and on the stairs for scale:
As I'm looking at him in pictures, I'm starting to realize just how strange is looks with no teeth...like Grampa Simpson without his dentures. I'm also a little concerned about the top jaw's angle, or lack thereof. I might go back and add an angled bit and carve in some teeth to the jaw.
Like I said before, he's not done -not even named yet- but he is no longer forgotten. Any comments orideas are more than welcome.

Dragon Trophy Update

I spent the last 2 days between the "Bent Cave" and the floor with couch cushions (I did something to my back...not happy with it) making bits and pieces for the dragon trophy.
I paper mache'd 4 balloons into egg shapes. and used the deer cutout (I mentioned in the previous post) to get the basic shape of the head the basic body framework of the dragon head itself.
Here's a shot of the eggs drying:
The eggs are going to be used to build up the mouth and crown area of the dragon.
This was my first time using chicken wire as a form for paper mache, Usually I just build it up layer after layer to get the shape I need, but with a project of this scale, chicken wire seemed the only option. Plus, it was a new skill to work with.
Here's a shot of the first wrappings of the chicken wire.
Yeah, it still kinda looks like a deer. Maybe if I add some paper mache, then it'll start looking dragon-ish....
hmmmm...not yet.....maybe if I add the horns on it, it'll stop looking like a deer....yeah, that's it!


Well, that was it! It no longer looks like a deer. We're talking...uhm...water buffalo? Bison?
I have a lot of work to do...

Egg Bank

I started making eggs so that I'd have some base forms to build the dragon head up from the basic 'deer' shape that I began with. However, since I had to wait for one thing to dry before I could go to the next step, I started sketching out another idea: A nested egg for a coin bank.
I've always loved the idea of a piggy bank, one that you can't get into, rather you have to break it to get what's inside.
I've been wanting a projector for a long time as we only have a 17" tv in the living room. Now, since we only have about 20 hours/week to actually watch TV, we can't justify spending $600 for one for such a small amount of time.
A projector however, will suit our needs of having a big screen for the times we want to watch Epic movies and my love of playing my RPG's on a big screen, as well as  using it for sketching out sets and backdrop designs.
So, this little project is something of the child of the Dragon Trophy.
I started off with a paper mache'd balloon for the egg shape. As you can see from the sketch above, I needed a nest for it. I've always responded well to visible reminders, so a bank of this scale should only meet with success.
I built the nest out of some crumpled up newspaper, shaped with masking tape and formed into a ring. I made a base from a leftover prototype of foamcore for a set I made a few weeks ago. I used masking tape to rough the whole thing together, then paper mache'd the whole thing into one unit.


Then I added 'sticks' made from rolled paper mache clay. Let's just say that individually, they had more of a likeness to 'cat poop'' than 'sticks'.
Right now, the pieces are drying. The next step is to wash the nest with a black acrylic paint wash, then highlight with various browns, and add some real sticks and pieces of twine to fill up the space. The egg itself will just require a simple sanding and a paint job.
More to come.

New Project: Dragon Trophy Head

Ever since I was a little kid, I always loved monsters. I'd always end up at the library looking at books in the mythology section (Dewey Dcecimal system 292.XX...how's that for memory?). I'd sit there for hours going through all the pages looking at the images and different renderings of  mythological beasts, battles with the gods and all the great stories.
I was also an avid player of Dungeons and Dragons (Dewey Decimal system 793.73, actually had to look that one up but remembered it when I saw it) - big surprise there, I'm sure- and loved the same illustrations. I loved to imagine how the creatures could exist alongside one another and how they would look in real life.
I would have to say that a good part of who I am today is made up from that kid in the library. I've always doodled creatures in the margins of my homework and Halloween has always been my favorite part of the year. Not just because of the costumes, but to see these creations come to life.
And so, I've decided that since I have a bit of free time coming up over the next while, I'm going to start in on an old project I've always wanted: A Mythological Trophy Room!
And of course, the first piece will be something of a centerpiece, a dragon head.
From experience, I know that I like to start off bold and grand with my designs, and that's also why I end up failing almost immediately. That's why I'm starting off reasonable and attainable for my first piece.
A few months ago I downloaded a template for a poster board mounted deer head (LINK) with the intention of making that for my studio space. On closer inspection of the shape, I've seen that it can be modified to be just about anything with a neck and head.
image credit to Chronicle Books
I wanna turn something like the image above into something like the image below.
or this

and in a perfect world, something more like this

Where have I been?

Well, the last few weeks (closer to months) I've been busy working with ISCANS for the end of year Coronation Ball. It required a non-stop slew of posters, invitations and printed media that needed to be out on tight deadlines.
I've worked with ISCANS for about 8 years now and this was by far the most involving year to date.
Although I wasn't posting my work on here, I was posting it on another blog I was running for the charity group for them to review and contact me for edits.
Here's a sampling of the work I did:

CORONATION WEEK EVENTS POSTER
A poster outlining the events of the week.
THE IMPERSONATION SHOW(S)
This was the official kick off to Coronation week. These were two shows, same theme, held at 2 bars in one night. A great little fund raising venture. Since they were connected, we stayed with the same poster and just changed the venue information.
AND

THE IN TOWN SHOW
An event showcasing the local talents that make up ISCANS

THE OUT OF TOWN SHOW AND STATE DINNER
A fund raising dinner held for the members of the Society, followed by a show featuring the talents of out of town performers.

CORONATION NIGHT
This was the program for the evening, and the attched cover. It was my first time using InDesign in over 3 years so I was a bit rusty, but they felt it was one of the best ones yet.
Here is the cover
And here is the link to it so you can view it through ISSUU
(a great pdf document reader when editing for print).


VICTORY BRUNCH
AQ morning brunch for all the attendants to ring in the new year, also to see who actually survived the weekend.

TOUGH DRAG SHOW
The first event of the new year where all the boys dress up like girls and do horrible, horrible numbers to help raise money for the charities.

So, as you can see, I've ben a busy little beaver the last while. And now that it's all over and everything went off great, I can now get back to my regularly scheduled work and start producing the things that I want to make.
Looking forward to posting the the new work soon.